
How to clean cat ears safely usually comes down to two things: using the right liquid, and knowing when to stop. If your cat has mild wax or a little smell, a calm, gentle clean can help, but if there’s pain, bleeding, or heavy discharge, you’re better off pausing and calling your vet.
Ear care gets ignored until a cat starts shaking their head, scratching nonstop, or you notice that unmistakable “something’s off” odor. The tricky part is that normal wax and a true ear infection can look similar at a glance, and the wrong approach, like using cotton swabs deep in the ear canal, can make things worse.
This guide stays practical: what “normal” ears look like, what supplies matter, a step-by-step method that most cats tolerate, and a short list of red flags so you don’t accidentally clean over a problem that needs treatment.
What “normal” cat ears look and smell like
Healthy ears are usually pale pink inside, with a light wax film at most. They should not smell strong. A faint “warm skin” smell can be normal, but a sour, yeasty, or rotten odor often signals trouble.
- Normal: light wax, minimal debris, no swelling, cat allows gentle touch.
- Questionable: frequent head-shaking, more debris than usual, mild odor, occasional scratching.
- Concerning: pain when you touch the ear, redness and heat, thick discharge, bleeding, head tilt.
According to the American Veterinary Medical Association (AVMA), ear problems can come from infections, parasites, allergies, and foreign bodies, so at-home cleaning is not a replacement for diagnosis when symptoms persist.
Common reasons cats get dirty ears (and what it can mean)
If you’re trying to figure out why the ears keep getting gunky, you’re not overthinking it. In many households, repeated buildup is the real clue.
- Wax buildup: can happen in any cat, sometimes more in seniors or cats with narrow ear canals.
- Ear mites: often look like dark, coffee-ground debris and usually cause intense itching.
- Yeast or bacterial overgrowth: commonly brings a stronger odor, damp-looking debris, and redness.
- Allergies: some cats get recurring ear inflammation as part of skin allergy patterns.
- Moisture and trapped debris: less common in cats than dogs, but it happens, especially if grooming habits change.
One practical way to think about it: cleaning helps remove surface wax and debris, but it won’t solve mites, infections, or allergic inflammation on its own.
Quick self-check: should you clean at home or call the vet?
Before you reach for supplies, do a 30-second check. This saves a lot of “I tried to help and now my cat hates me” situations.
Okay to try gentle cleaning at home
- Light wax with no swelling
- Mild odor that comes and goes
- Cat is acting normal, eating and resting normally
Skip home cleaning and contact a professional
- Pain, crying, or sudden aggression when ear is touched
- Blood, open sores, or thick yellow/green discharge
- Head tilt, loss of balance, or rapid eye movement
- Symptoms lasting more than a couple days, or returning quickly
According to the American Animal Hospital Association (AAHA), ear issues can worsen if the eardrum is damaged, and some medications or cleaners can be unsafe in that situation, so getting an exam matters when signs look severe.
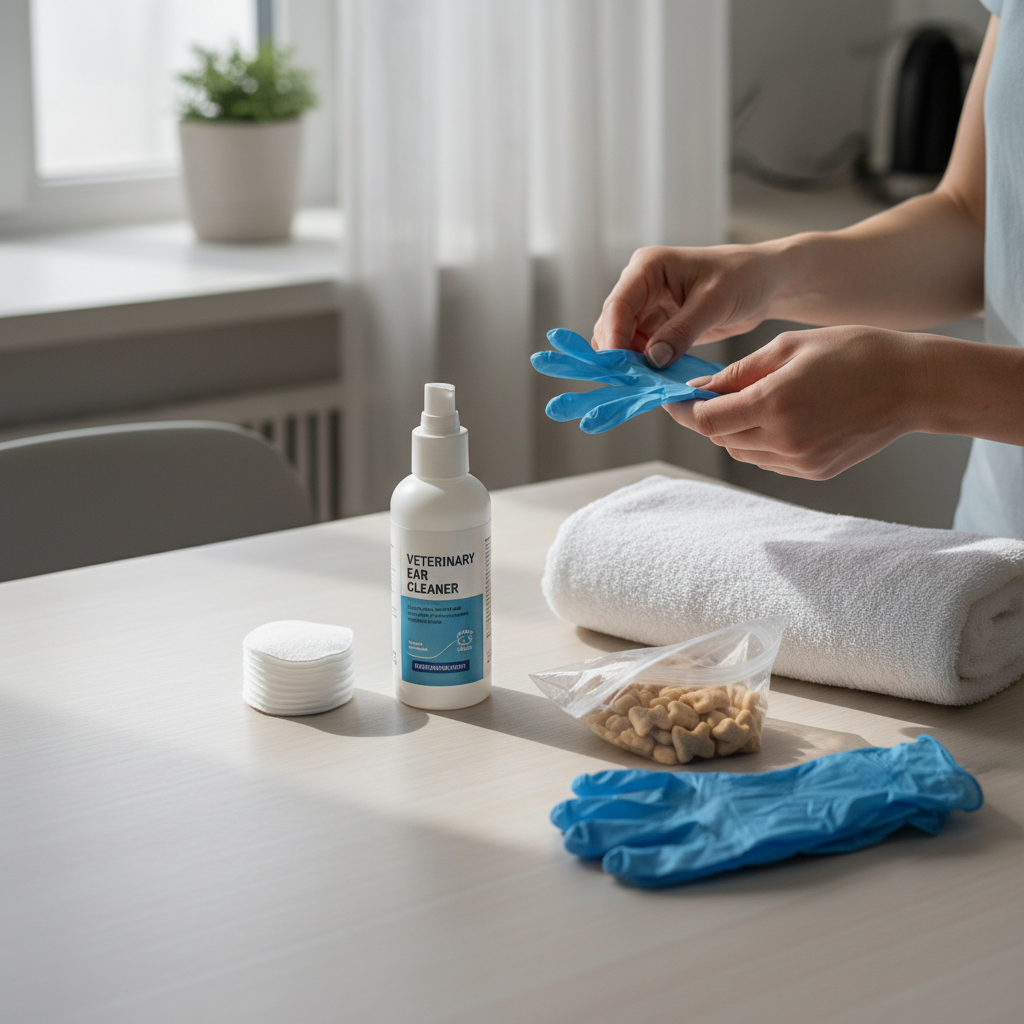
What you need (and what to avoid)
The easiest way to clean a cat’s ears safely is to keep it boring: simple tools, no harsh liquids, no digging.
- Vet-recommended cat ear cleaner (ask your clinic which brands they prefer)
- Cotton pads or soft gauze squares
- A towel for a “kitty burrito” wrap
- Treats your cat actually values
Avoid these, even if they show up in DIY tips:
- Cotton swabs for deep cleaning, they can push debris farther in and irritate the canal
- Hydrogen peroxide and alcohol, often too harsh and drying
- Essential oils, they can irritate skin and some are unsafe for cats
- Random “home mixes” unless your veterinarian explicitly okays them
Step-by-step: how to clean cat ears safely at home
This is the version that tends to work in real homes: short, calm, and not perfectionist. You’re aiming for “clean enough,” not spotless.
1) Pick a low-stress setup
- Choose a quiet room and close the door.
- Put the towel on your lap or a counter with a non-slip mat.
- Have everything open and ready, fumbling increases stress.
2) Do a quick look and sniff
- Lift the ear flap, check for redness, swelling, or wet discharge.
- If you see blood, stop and call your vet.
3) Add ear cleaner correctly
- Hold the ear flap up, point the bottle tip near the opening.
- Squeeze a small amount in, enough to wet the canal entrance, not “fill the ear.”
- Keep the nozzle from touching the ear, this helps avoid contamination.
4) Massage, then let your cat shake
- Massage the base of the ear for 15–20 seconds, you may hear a soft “squish” sound.
- Release and let the head shake happen, it brings debris outward.
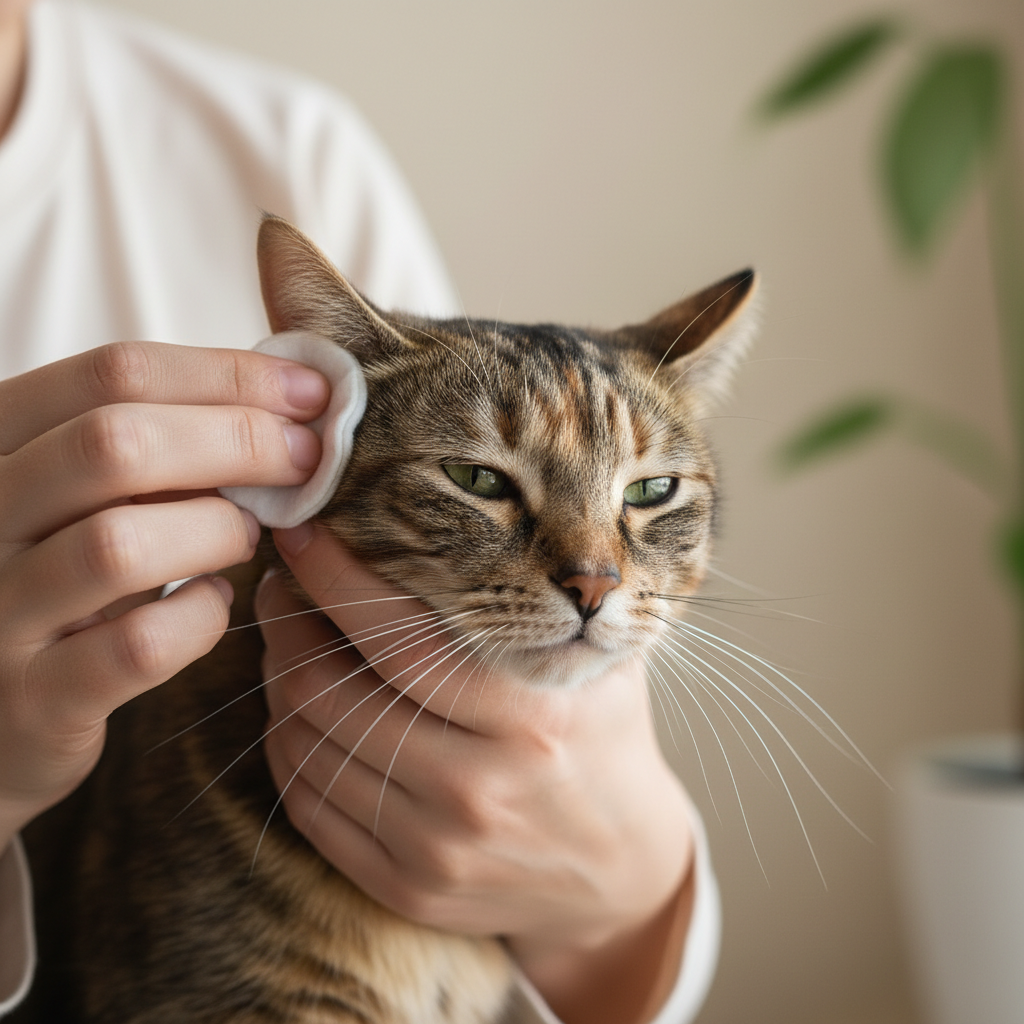
5) Wipe what you can see
- Use a cotton pad or gauze to wipe the inside of the ear flap and the visible entry area.
- Do not push material down into the canal, if you can’t see it, leave it.
6) Reward and stop early if needed
If your cat goes from “annoyed” to “panicked,” call it. One short session today and another in a few days often works better than wrestling for a perfect clean.
How often to clean cat ears (a realistic guide)
Some cats never need routine cleaning, and that’s normal. Over-cleaning can irritate the ear canal and trigger more wax production, which feels unfair but happens.
| Situation | Typical approach | What to watch |
|---|---|---|
| No odor, minimal wax | Skip routine cleaning | Monthly quick visual check |
| Light wax buildup | Clean as needed | Redness, scratching, odor returning fast |
| Recurring debris or smell | Vet visit to find the cause | Repeat flare-ups, sensitivity, thick discharge |
| On vet treatment plan | Follow clinic instructions | Missed doses, worsening signs |
If you’re unsure, ask your veterinarian what interval makes sense for your cat’s history, age, and ear anatomy.
Mistakes that backfire (even when your intent is good)
- Cleaning too deep: the ear canal is sensitive and shaped in a way that makes “digging” risky.
- Using harsh liquids: alcohol-based products can sting inflamed skin and make cats fight harder next time.
- Ignoring the smell: persistent odor usually means inflammation, not just “dirty ears.”
- Stopping treatment early: if a vet prescribed drops, ending early can lead to recurrence.
According to the ASPCA, cats can hide discomfort, so behavior shifts like avoiding touch or hiding more can be an early clue that the ear needs medical attention, not more cleaning.
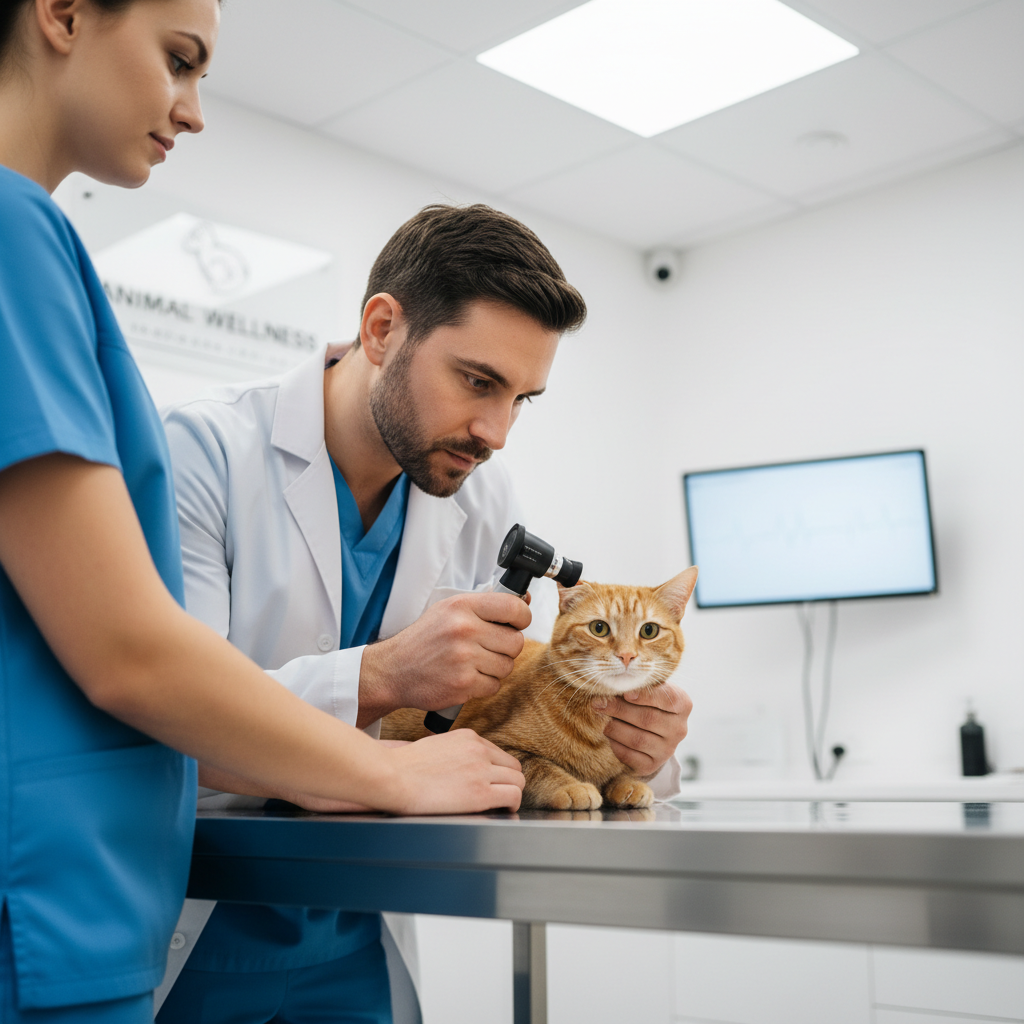
When to seek professional help (and what the vet may do)
If you’re repeatedly searching how to clean cat ears safely because the problem keeps coming back, that repetition is the signal. Ear disease often needs a specific diagnosis.
- Your vet may look in the ear with an otoscope to check for inflammation, foreign material, or eardrum concerns.
- They may take a swab to check for yeast, bacteria, or mites, then choose targeted medication.
- If buildup is heavy, a professional ear cleaning might be recommended, sometimes with mild sedation for safety.
This is also where you can ask the most useful question: “Is this a one-off infection, or does my cat’s ear anatomy or allergies make this likely to recur?” The plan changes depending on that answer.
Key takeaways you can actually use today
- Keep it gentle: clean what you can see, avoid deep probing.
- Use the right product: a cat-safe ear cleaner beats DIY liquids.
- Watch for red flags: pain, blood, thick discharge, head tilt mean stop and call a vet.
- Less can be more: many cats do better with occasional, calm sessions than frequent cleaning.
If your cat has mild wax today, set up supplies, keep the session short, and aim for “good enough.” If signs look more intense or keep returning, book a checkup so you’re not guessing.